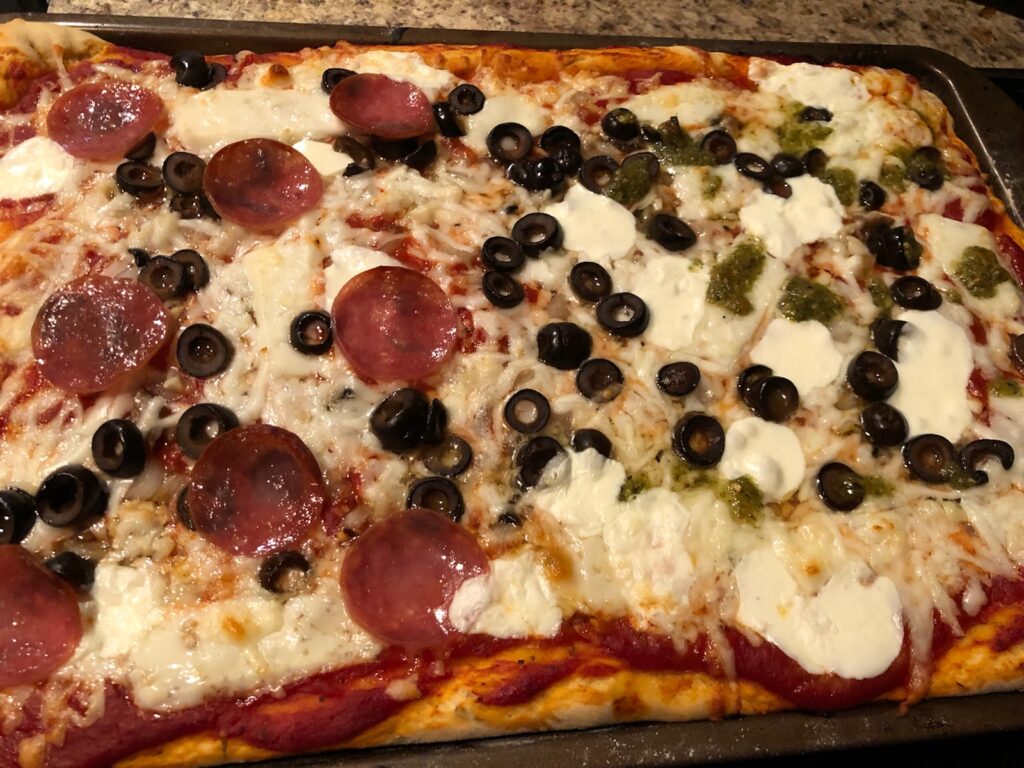
My husband told me all about how he and his brother used to make pizzas with their mom. Spreading sauce, distributing cheese and meats… but he admitted they didn’t make their crust.
So to one-up his childhood, we had to make our own crust.
My last effort at yeast bread, literally just following my mother’s perfected recipe for high-altitude bread machine bread, turned into an explosive, gooey mess.
Which is to say, I’m honestly a little intimidated by yeast breads.
So part of my googling was for “easy” or “beginner” recipes, and I came across what claims to be the easiest recipe for pizza dough.
Of course, I’ve heavily edited that recipe – mostly adding more spices and herbs.
Ingredients
two to three cups of bread flour, divided into one cup and the rest
two to three teaspoons fresh yeast – from this year, at least
I like it best with no sugar, but in theory a teaspoon of sugar might help it rise
3/4 teaspoon garlic salt
at least 3 teaspoons of herbs – Italian mix, garlic or onion powder, whatever tickles your palate
(I think a bunch of rosemary helps, too – fresh or dried)
two tablespoons EVOO (extra virgin olive oil), plus more to coat & drizzle
3/4 cup warm water (I aim for the temperature of a pleasantly warm bath)
Mix all the dry stuff together with one cup of flour.
Add two tablespoons EVOO and the 3/4 cup warm water, stir well. It should smell delicious – if it doesn’t, I add more spices. I use a spatula to scrape the edges, but I don’t really think the utensil matters.
Add more flour, a bit at a time, until it isn’t so tacky and sticky, and starts to hold together. I rarely use my hands, but give it a poke-test every few additions – if gummy dough sticks to your finger, it’s too wet and needs more flour.
Please don’t worry about measuring the flour. Everything from humidity to storage techniques influence the moisture level, so aim for quality over precise quantities.
This is another area where my recipe differs from the original: they coat the dough in olive oil before letting it rest, while I don’t worry about it. I figure I’ll deflate and mix and deflate and mix enough that it won’t stay coated, so whatever. I just put the whole bowl, spatula and all, in a warm space, and try not to forget about it.
(Hint for a warm space: turn the oven on for a few minutes, then turn it off, check it’s not too hot, and put the dough in the turned-off-oven to stay warm. PLEASE BE CAREFUL AND DON’T BAKE PLASTIC, NOT EVEN ON ACCIDENT.)
The recipe says to let the dough rest 30 minutes, which I see as a fine minimum. Sometimes I let it rest overnight, sometimes a few hours – generally, the longer I plan to let it hang out, the (a) less yeast I use, and (b) the higher moisture levels I aim for. I am far too lazy to cover the whole thing in moisture-containing plastic wrap, but I’m also fine with adding a bit more water or flour as needed. Spritzing the dough before it rests is an option.
When I remember the dough exists, generally between 3 and 30 hours later, I deflate it (whack it!) and fold it several times in the same bowl with the same spatula. I may or may not let it rise a second time. Sometimes I do the second rise in the same bowl, sometimes I shape the dough and then do a second rise, sometimes I forget it all exists and go to bed and make it work the following day.
It’s forgiving.
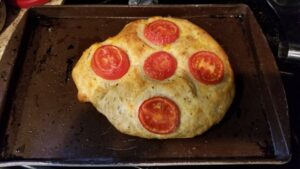
Eventually, shape the dough into your desired bread – wide, thin crust for pizza, or more loaf-like for focaccia, maybe with thin tomato slices pressed into the bread (or, heck, thick tomatoes), or maybe with the whole pizza sauce and cheese and whatever else.
Painting olive oil all over the bread (a pastry brush helps) will make it crispier, but isn’t necessary.
Remember: the thinner the bread, the faster it cooks. The more toppings, the longer it’ll take.
Pamming the surface works, but so does a solid sprinkle of flour. Or drizzle oil over the cooking surface. It’s flexible. We generally just cook the bread on an oven sheet, like for cookies, with a generous sprinkle of whatever flour I used in the bread to prevent sticking.
Check out the linked site for more details on shaping and prepping the bread, but know that it doesn’t really matter a whole lot as far as quality of bread goes.
Preheat an oven to somewhere between 415 and 450–pick a temp and stick to it for future iterations of this bread–and bake until crispy and fluffy and done. Depending on how thick the bread is, this might be 10 minutes or 30 – keep an eye on it, and when you check on it, thump it like a drum to learn what “done” bread sounds like. (Hint: “done” bread sounds more hollow and low than still-undercooked bread, which sounds more like when you thump your arm.)
There’s a learning curve here, possibly the trickiest part of the whole affair, but study the bread and you’ll learn how to tell when it’s done. Undercooked bread is still pretty delicious, and I definitely eat the crusty burnt edges, so even when it’s bad, it’s good.